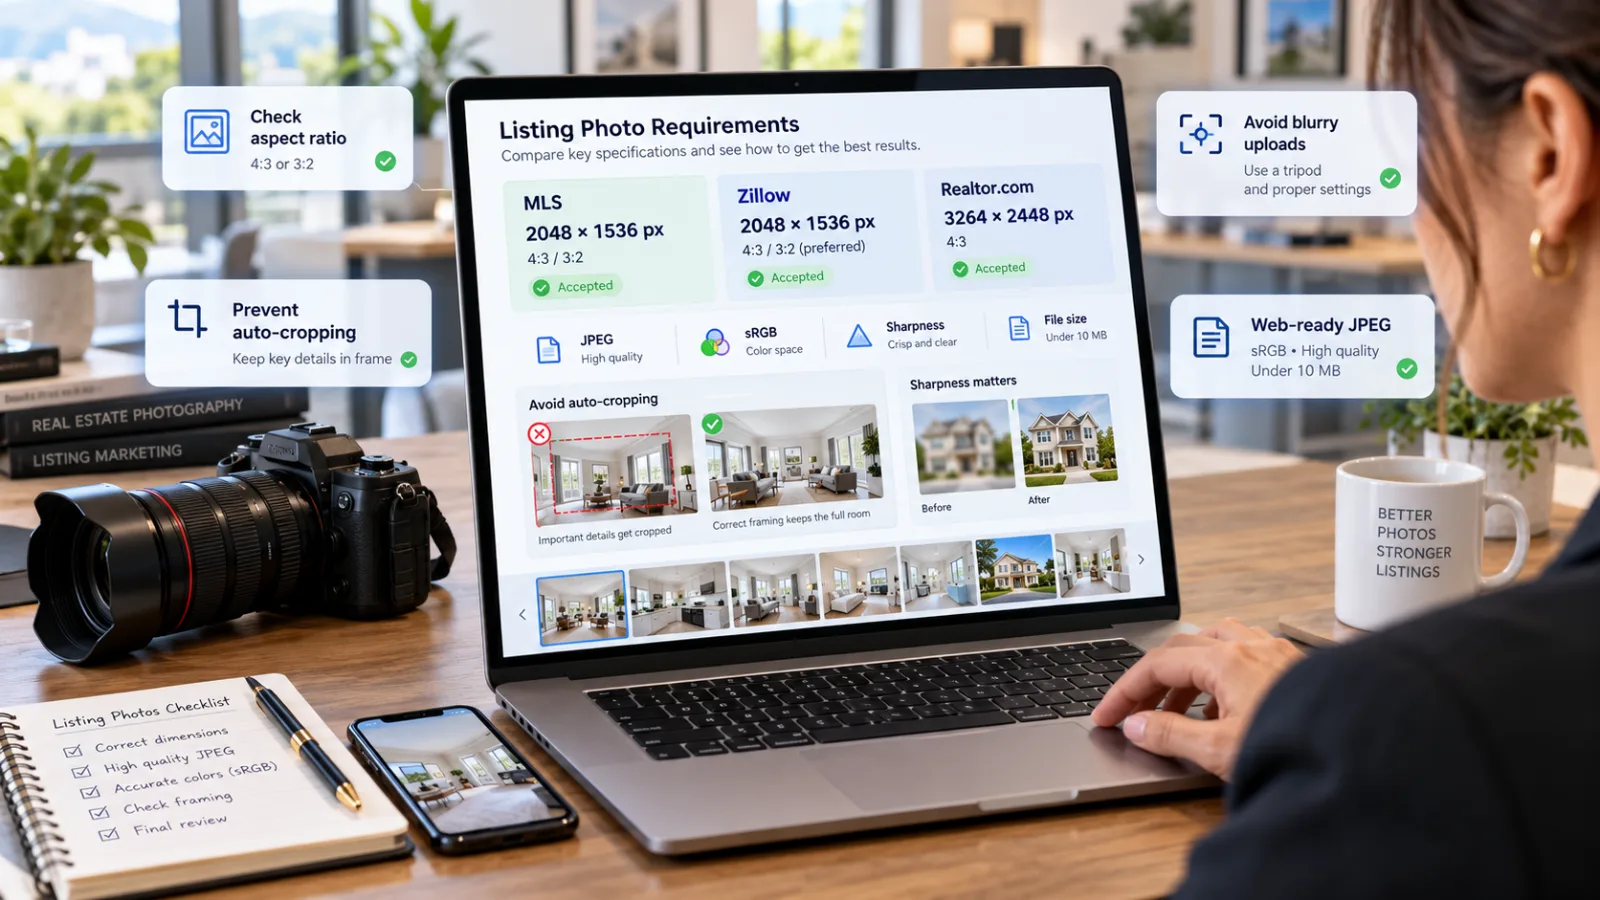
You've just received a beautiful set of professional property photos. The rooms look bright, the windows are perfectly exposed, and every shot is carefully composed.
Then you upload them to your MLS or Zillow.
Suddenly, the living room looks blurry. The kitchen photo is awkwardly cropped. One image won't upload at all.
Sound familiar?
These problems often come down to image dimensions, aspect ratios, file formats, and compression settings.
Understanding the correct MLS photo size can save real estate agents and photographers hours of frustration while ensuring properties look their best online.
Here's what you need to know about preparing listing photos for MLS platforms, Zillow, and Realtor.com in 2026.
What Is the Best MLS Photo Size?
The short answer: there is no universal MLS photo size requirement.
Each Multiple Listing Service can establish its own upload specifications. Requirements may also differ depending on the software used to manage listings.
That said, 2048 × 1536 pixels is a practical 4:3 export option for many real estate photography workflows, provided your local MLS accepts it.
It offers enough detail for online viewing without creating unnecessarily large files.
However, you should always check your MLS's current requirements before exporting an entire property shoot.
MLS Photo Size: Common Dimensions Compared
Dimensions | Aspect ratio | Typical use |
|---|---|---|
1024 × 768 px | 4:3 | Smaller web-ready images |
2048 × 1536 px | 4:3 | High-quality listing export |
2400 × 1600 px | 3:2 | Standard camera photography |
3000 × 2000 px | 3:2 | Higher-resolution MLS workflow |
These are examples, not universal minimum or maximum requirements.
For instance, California Regional MLS (CRMLS) documents limits of 15 MB or 3000 × 2000 pixels per photo in its Flexmls workflow.
That doesn't mean every MLS uses those limits.
4:3 vs. 3:2: Which Aspect Ratio Should You Choose?
Most professional cameras capture photographs in a 3:2 aspect ratio, while many smartphone cameras use 4:3.
Both can work well for real estate photography.
A 4:3 image provides a slightly taller frame, which can be useful for interiors where you want to show both the floor and ceiling.
A 3:2 image offers a wider composition, often preferred for exterior photography and spacious rooms.
Neither format guarantees better visibility.
What matters is keeping the proportions consistent and avoiding unnecessary cropping.
Never stretch a 3:2 photograph into a 4:3 frame. You'll distort the room and make the image look unnatural.
Zillow Photo Size vs. Realtor.com: What's Different?
Although Zillow and Realtor.com display similar property photography, their published image recommendations are not identical.
Zillow Photo Size Requirements
According to Zillow's official Photo Uploading Tips, its Home Details photo guidance specifies:
Recommended dimensions: 2048 × 1536 pixels
Listed minimum dimensions: 1024 × 768 pixels
Maximum file size: 25 MB
Supported formats include JPEG, PNG, TIFF, and others.
These specifications relate to Zillow's documented photo-upload feature. Images supplied through an MLS or another listing feed may follow a different processing workflow.
For everyday listing photography, a high-quality JPEG is usually a sensible choice.
Avoid repeatedly saving and compressing the same file. Each lossy JPEG export can gradually reduce image quality.
Realtor.com Photo Size Recommendations
Realtor.com's official image size guidance lists 3264 × 2448 pixels for listing photos.
That's a 4:3 aspect ratio, matching the proportions of Zillow's recommended Home Details dimensions but at a higher resolution.
However, this is Realtor.com's published image recommendation, not proof that every MLS feeding Realtor.com requires that exact size.
If your listings are syndicated from an MLS, start by following the MLS specifications.
Then check how the images actually appear on Realtor.com.
Why Do Listing Photos Sometimes Look Blurry?
Even a high-resolution photograph can lose quality after uploading.
The most common causes include excessive JPEG compression, automatic resizing, uploading an already compressed image, and cropping a small portion of a photograph.
Another frequent issue is relying on previews rather than original files.
For example, downloading a photograph from a messaging app may give you a smaller, compressed version instead of the photographer's full-resolution image.
Best practice: Keep the original high-resolution files and export separate versions for different platforms when necessary.
Use the sRGB color space for predictable web display, and consider JPEG quality around 80–90% as a starting point rather than a platform requirement.
For UK agents publishing on Rightmove or other property portals, the same principles apply, but US MLS specifications should not be treated as UK upload rules.
Why Good Photo Dimensions Aren't Enough
Let's imagine two property listings.
Both use correctly sized, high-resolution photographs.
The first shows a dark living room with tilted walls, cluttered countertops, and unnatural colors.
The second presents the same room with balanced lighting, straight vertical lines, and a carefully selected composition.
Technically, both images meet the upload requirements.
Visually, however, they create very different impressions.
This is why real estate photo quality matters just as much as image dimensions.
Correcting Light, Perspective, and Color
A technically sharp photograph may still need adjustments.
Common real estate photography issues include overexposed windows, excessive shadows, mixed lighting, and converging vertical lines caused by camera tilt.
Professional real estate photo editing can help correct these problems while preserving the property's actual appearance.
The goal isn't to make a room look bigger or hide imperfections.
It's to represent the property accurately, with natural lighting, realistic colors, and balanced perspectives.
What About Empty or Cluttered Rooms?
Empty rooms can be difficult for buyers to understand.
Without furniture, it's not always obvious whether a space comfortably accommodates a double bed, dining table, or sofa.
This is where AI virtual staging for real estate becomes useful.
Virtual staging adds digitally simulated furniture to help buyers understand a room's potential.
It should preserve the property's architecture, proportions, permanent finishes, and existing features.
Virtually staged images should also be clearly identified and accompanied by the original photographs, in line with the applicable MLS rules.
Can You Remove Furniture From a Photo for Free?
Searching for "remove furniture from photo free" brings up various AI image-editing services.
Some offer limited free credits or trial features.
However, removing furniture isn't always straightforward.
AI must reconstruct the floor, walls, and other surfaces hidden behind the objects. Those reconstructed details may be inaccurate.
For property listings, this matters.
A digitally generated floor might accidentally conceal damage or suggest a different room layout.
Removing temporary clutter can help buyers focus on the space, but altered images should be reviewed carefully, disclosed when required, and never used to hide material defects.
Real Estate Photo Upload Checklist
Before uploading your next listing, take a few minutes to review the complete photo set.
Check dimensions: Confirm your MLS or portal's accepted pixel dimensions before exporting.
Verify the aspect ratio: Use consistent 4:3 or 3:2 images without stretching the original photograph.
Straighten vertical lines: Doors, windows, and walls should appear naturally aligned.
Balance exposure and colors: Avoid dark interiors, blown-out windows, and unrealistic color casts.
Review the composition: Keep important room features visible and allow space for automatic thumbnail cropping.
Export as JPEG: Use web-friendly compression and an sRGB color profile.
Check file size: Stay within the relevant upload limit without sacrificing unnecessary detail.
Inspect sharpness: Review the exported image at 100% magnification before uploading.
Choose the right cover image: Lead with a bright, representative photograph that makes buyers want to explore the listing.
Check the published listing: Open the actual MLS or portal page on desktop and mobile to spot cropping or compression problems.
For professional photographers, maintaining separate master files and delivery exports makes this process easier.
For agencies managing dozens of listings, a consistent export workflow reduces mistakes and keeps property presentations looking professional.
Frequently Asked Questions
Is 2048 × 1536 a good MLS photo size?
Yes, it's a practical high-resolution 4:3 export size. However, your local MLS may have different recommendations or limits.
What is the recommended Zillow photo size?
Zillow's Home Details photo guidance recommends 2048 × 1536 pixels. Check whether your listing is uploaded directly or supplied through an MLS feed.
Should real estate photos be JPEG or PNG?
JPEG is generally preferable for standard property photography because it delivers good visual quality with smaller file sizes. PNG can be useful for certain graphics, but it usually produces larger photographic files.
Does higher resolution always mean better listing photos?
No. A larger image cannot compensate for poor focus, excessive noise, weak lighting, or an unattractive composition.
Conclusion: Get the Dimensions Right, Then Focus on Presentation
Choosing the correct MLS photo size is an essential step in preparing a professional real estate listing.
For many workflows, 2048 × 1536 pixels is a useful starting point. Zillow and Realtor.com publish different guidance, while individual MLS platforms maintain their own requirements.
But dimensions are only part of the equation.
Sharpness, natural lighting, accurate perspectives, thoughtful framing, and consistent editing all contribute to a stronger property presentation.
Before your next upload, verify the technical specifications, inspect your images at full size, and check how they appear on the final listing.
And when your photographs need that extra professional finish, explore tools designed specifically for real estate photography.
Great listing photos aren't simply the right size. They show the right property, in the best possible light.
Related Guides
Want to apply these tips in minutes? Try AI real estate photo editing that keeps the property true to life, see how agencies share one photo workspace, or compare photo editing plans and prices.
Sharper listing photos, true to the property.
See pricing